Finally got around to restarting the MB-Sid project.
For the Optimised c64 PSU i am using a special wireless protoboard as mentioned here.
Here is my plan for the board.
*Note* The Pin out for the C64 PSU socket is wrong in the diagram.
The GND lead should be connected to the bottom middle pin, instead of the top middle pin!
The view is from the bottom / solder side of the board
The only part im unsure about is where the 5V+ line meets the GND (-) line (coming from the rectifier), and goes off in parallel to the 220k resistor and LED.
Note: I didnt bother putting every cut hole needed in the plan.
The reason for 2x4 SIL Pins at the 5v DC end is i can supply 4 Cores if needed in the future.
The reason for 8 DIL Pins at the +14V end is to supply upto 8 Sid modules easily.
Well finally i managed to get the PSU finished, and got a stable 14V and 5V dc reading.
As many have said before, BUY A DAMN GOOD SOLDERING IRON!
It makes life 10 times easier.
Because im using a panel mount Socket for the C64 psu,
ive connected it using sil headers for the AC (yellow wires) and DC lines, (black and red wires).
So i can detatch it and use it in a different case in the future (i think ive thrown out the top of the c64 case! damn)
Also, i broke the original C64 LED, and tried using a Green LED from an old PC which tends to get hot, so hot in fact that it shines Amber instead of green!
Anyone know off hand what rating the LED should be to replace the c64 LED?
I’ve used all sorts of cables for audio - the difference is subtle to say the least if you don’t run the audio cables parallel to power or monitor cables
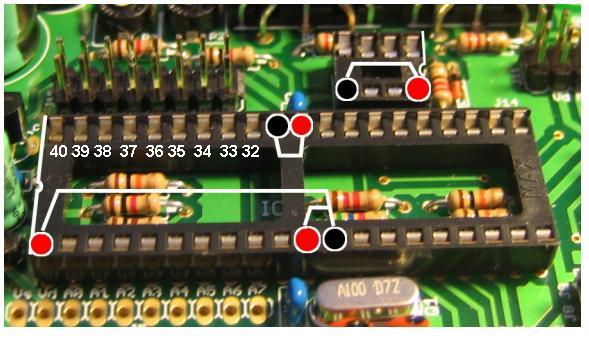
it would be hard to get that part off in one piece. Just get brute force on it and cut the black part off with wire cutters then you can heat up each whole and pull the pins out one at a time with plyers. You can always get another piece or even some regular resistors to replace that.
it would be hard to get htat part off in one piece. Just get brute force on it and cut the black part off with wirecuttersthen you can heat up each whole and pull the pins out one at a time with plyers. You can always get another piece or even some regualr resistors to replace that.
Right?
Right on!
The only thing i’d be afraid of is damaging the pads but i guess i’ll just have to be careful.
Dont be affraid, Even if you damage the pads (which sucks) you can always conenct a piece of wire or something. Just cut one pin at a time. Youll be fine. Once you break it and fix it again, youll be that much better! I can talk as I have pulled more than one pad in my day…
Sorry lief, but no, no , no!!! It’s easy to not damage the pads if you resign yourself to losing the resistor network. Just do this:
With no heat applied, bend the resistor network to each side until it breaks off. Or use cutters if you can get in there. You will be left with the just the broken-off leads soldered in place.
Find a work surface you don’t mind leaving marks on, or spread some newspaper over a table.
Hold the board in one hand, underside up, and the soldering iron in your other hand. Apply heat to one of the leads. The solder all around it will melt. The component lead may even fall out. If not, it should be easy to get out, either by gently pushing on it with your iron’s tip, or with tweezers on the other side of the board.
If the hole is still clogged up with solder, consider heating up the joint and gently tapping the board against the table. The solder will often just fly out. Failing that, copper braid or stranded copper wire works OK here, but a vacuum tool of any sort (sold-a-pullt or a cheap rubber bulb) works wonders.
Brute force shouldn’t be necessary unless you needed it to insert the component.
Plated thru-holes often have connections on both sides of a circuit board. If you apply heat and brute force, you are likely to damage those connections, and you may even lift a trace right off the board. Repairs are usually possible, but it’s much easier to just spend a few extra minutes practicing safe desoldering.
BTW the resistor network can then be replaced with another one, or it may be easier to just get some resistors and do the “alternate loading”.
Oh Im not hating or anything. The brute force comes in the form of cutting the resistor network or in your case bending it back and forth until it breaks. At that point using the solder iron will be a piece of cake to get each leg out. I was just trying to say that one should not be affraid of pulling the pad as that will result in not doign anything. Plus I would guess that lots of people besides myself have done so at some point and I would also guess that what ever they were working on is not dead as a result (hopefully).
But you are right about all that you said and much more elegent than my description.
Either way homeboy should get on the good foot and get it done.
And lastly I was just trying to tell him not to be affraid of effing it up as it wont really be broke.
Dont be affraid, Even if you damage the pads (which sucks) you can always conenct a piece of wire or something. Just cut one pin at a time. Youll be fine. Once you break it and fix it again, youll be that much better! I can talk as I have pulled more than one pad in my day…
If i do damage the pads i just realised that theres pads on both sides, so i could always solder standard resistors on the opposite side of the board.
And nebula thanks a lot for the walkthrough, ill try it later.
And thanks for the optrex display too! Its working perfect and I really like it!
Is anyone here using recent modules from smashTV???
I want to know how the connections between the CORE_R4D and SID_R3A modules are made…can you help me??
my current connections are:
CORE SID
J10 J2
---- ----
MD ----> ??
SO ----> SO
MU ----> MU
RC ----> RC
CLK ----> CLK(PWM???)
SC -??-> SC(not connected)
Vd ----> (not connected)
Vs ----> (not connected)
my questions are:
Is CORE:J10:MD supposed to be connected somewhere in the SID module???
should I connect CORE:J10:SC to SID:J2:SC ???
I’m using ONE CORE and TWO SID modules in a STEREO SETUP so I’m using the “mbhp_8xsid_c64_psu_optimized.pdf” document as a guide for my connections, but my SID_R3A doesnt have a J2:MD, and instead of PWM I have CLK in both modules (I supose its the same thing with a different name).
I have the PSU circuit already mounted and I think its working nicely cause I get the expected voltage values (5.2V in the PIC and Octopler and 9.2V in SID), I’m just not secure about the connections mentioned above…can you help???
 Getting a bit dizzy trying to follow the lines here..